Sunday, October 16, 2011

B is for Butternut

Simple Butternut Squash Soup


Serves 4

Ingredients

1 medium-sized butternut squash, about 2 pounds, prepped and cut into 1-inch cubes
1 medium onion, chopped
3 cloves of garlic, minced
3 cups unsalted chicken stock, warmed or room tempurature
3 tbsp evoo
2 bay leaves
1 tsp all-purpose seasoning
a pinch of dried sage and/or 10 fresh leaves [optional - see note]
freshly cracked pepper, to taste
coarse sea salt, to taste

Note: If you have access to fresh sage, one of the most delightful [albeit a little unhealthy] things to do with sage is to fry it. Yes, fry it. You can make it before you start to use as a garnish for the soup... and for a little snack while cooking. Simply heat a few tbsps of evoo in a small saucepan over medium to medium-high heat. Rinse and very thoroughly dry sage by pressing between a couple paper towels. Add sage leaves to pan and toss with wooden spoon until crisp and dark green. Transfer to a paper towels to drain excess oil and cool. Simple as that!


Directions

1. In a large saucepan, heat 2 tbsp of evoo over medium heat. Add bay leaves and onion. Cook until onion is soft, about 5 minutes. Add garlic and squash to the pot. Season with salt and pepper. Cook, stirring occasionally, until fragrant, another 5 minutes. You may add another tbsp of evoo during the process if the vegetables need more coating.

2. Add dried spices and stir as you gradually pour in the chicken stock. Bring up to a simmer and let cook til squash can be easily mashed against pot with a wooden spoon, 25-30 minutes.

3. Let cool slightly before puréeing. If using a blender, make sure to allow the heat to escape from the lid's removable cap. Cover hole with kitchen towel or paper towel while blending to prevent spattering. You may use an immersion blender if you have one. [Either way, remember safety first! It's much easier to reheat cold soup than it is to clean up a real hot mess.]

4. Transfer back to pot and serve hot.


Serve with a dollop of Greek yogurt and freshly ground black pepper... and of course, a few crisp sage leaves.

Monday, August 1, 2011

A is for Asparagus


Pepper Roasted Asparagus

This is almost too simple to be a recipe, but I made it for lunch today [along with some amazingly refreshing shimp cocktail- see note] and had to share it with you. The roasting process brings out such a wonderful sweet/savory combo from each spear and crisps up it's elegant crowns. Of course, all vegetables can be magically transformed when roasted, but one of the best things about roasting is how simple and easy it is! Add cherry tomatoes, balsamic vinegar, and minced garlic for an company-worthy side dish, or add Kalamata olives and lemon juice [with grated peel] to serve alongside fish. Enjoy!

Serves 4

Ingredients

1 lb asparagus, washed and trimmed
1 tsp all-purpose seasoning
pinch of red pepper flakes [a pinch more if you like things spicy]
freshly cracked pepper, to taste
coarse sea salt, to taste
1 tbsp evoo

Notes: For a simple and healthy lunch, arrange garden-fresh lettuce on a medium platter. Fill a bowl with crushed ice and place smaller bowl on top of that to hold cocktail sauce. Place 1 lb of cooked shrimp on the perimeter of platter with tails facing outward. Chop a few sprigs of tarragon to add a bit of fressness to cocktail sauce and pour into small bowl. Serve with asparagus spears and tall glass of iced tea. Serves 4.

Directions

1. Preheat oven to 375 degrees. Place asparagus in a single layer on a baking sheet. Drizzle with olive oil and shower asparagus evenly with herbs and spices.

2. Shake pan vigorously from side to side to coat spears and place in the middle rack of oven. Roast for 15, until tender, yet crisp. Asparagus should still have a brightness to it. [See pictures]

3. Serve hot from oven or at room temperature.


Saturday, July 30, 2011

Classic Summer Comfort Food


Summer Corn Chowder

Tah-dah!!! Introducing the new and improved, ultimate non-dairy chowder! It has taken me several tries and various methods, but what I'm sharing with you is the easiest, tastiest, smoothest [yet toothsome] chowder I've tested. First recipes took hours of purée-ing and transfering between bowls and pots, using leeks and a gazillion potatoes... and the texture was there, but flavor had been lost in all the steps.


So I decided to really strip this recipe down to it's bare essentials: corn, potatoes, and that oh-so-comforting creamy flavor that can only get from real cream, but wait... is there no way around using some form of creamer?! In trying all these versions I realized that the creamy flavor comes not directly from the diary, but from the corn and it's gloriously starchy cob. Finally a solution!


Take full advantage of the season by getting farm fresh corn and cutting off the kernels yourself. By adding both the kernels and the cob, you create that satisfying sweet/salty/buttery combination that needs no help from the dairy isle. Of course, if you're entertaining with this dish, just have a small saucepot of warmed half & half or cream on the stove for guests who prefer the more traditional recipe. Keep a ladle nearby for when it's time to serve.


I will be posting more family-style dinners as the harvest gets more and more bountiful. I actually added some minced radishes to this chowder as a way to use them up. We planted more than we had originally planned for, but that has forced us to use them in various recipes. [They add a great peppery flavor that balances out all the sweet notes of the chowder. It's sooo good!]

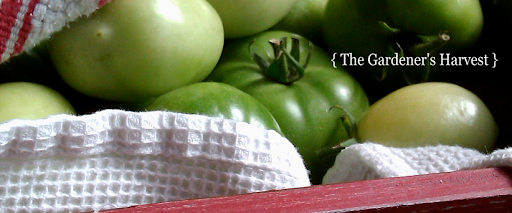
Waiting for some squash, cukes and tomatoes to ripen... any day now!


Serves 6-8

Ingredients

4 thick-cut bacon slices
1 large onion, diced
3 ribs celery, diced
1 tbsp unbleached flour
2 bay leaves
organic all purpose seasoning
bundle of fresh thyme sprigs, tied with kitchen twine
3 ears fresh corn, shucked and silk removed
3 medium red russet potatoes, diced
3 cups unsalted chicken stock, warmed or room tempurature
4 cups original rice milk [not vanilla!!]
4 radishes, minced
fresh parsley, chopped
olive oil

oyster crackers, optional (but adds nostalgia!)

Note: This is one of those times when owning a large Le Creuset pot is a huge advantage. Yes, they are heavy and some can be expensive, but the good ones... boy oh boy, are they good... provide a just-like-grandma-used-to-make vessel for everyday comfort food. A well-seasoned cast iron pot is easy to clean and, with proper care, will last a lifetime - if not several!


Directions

1. Cook bacon in large, heavy-bottomed pot, until most of the fat has rendered and bacon is browned and crispy. Remove from pot and set aside on paper towels to drain.

2. Add onion and celery to pot. Season with salt, pepper and all-purp. Cook over medium heat, stirring occasionally, until onions are translucent and celery is soft, 8-10 minutes. [You may add a couple tablespoons of butter or margarine if more fat is needed.]

3. Add flour to vegetables and stir thoughoughly to prevent clumps in broth. Once combined, add bay leaves, thyme, potatoes, and corn cobs. Gently stir in stock. Bring to boil, then reduce heat to medium and let simmer until potatoes are almost tender, stirring occasionally, about 20 minutes. Add corn kernels, radishes and rice milk, cover pot, and let mixture simmer on medium-low for 10 minutes more.

4. Turn off heat. Remove thyme and bay leaves from pot. Transfer 2 cups of chowder [minus the corn cobs] to blender and purée. Add purée back to chowder and stir to combine. [This will thicken the chowder - you may add more or less depending on your preference.]

5. Bring heat back to medium and, once again, stir occasionally til heated through. Season to taste with salt and pepper.


Serving Suggestion: After plating, garnish with fresh chopped parsley and a drizzle of good olive oil. Serve oyster crackers and crumbled bacon on the side.

Saturday, July 16, 2011

A Family Favorite


Marilyn's Olive Dip with Fresh Dill

This is one of those recipes that will forever be a part of my culinary repertoire. Yes, it's dip, but this is the perfect recipe when it comes to last minute entertaining [and late night snacking]. My mother's friend Marilyn gave her the recipe after tasting it at a get-together and it's been in our family ever since. The original recipe included real cream cheese, miracle whip, olives, and walnuts, but I've made some substitutions to make it a bit healthier. The addition of fresh dill adds a new life, but the soul of the dip definitely still there. Salty, sweet and easy to prep - this recipe is truly a family favorite.

Serves 8 to 10

Ingredients

8 ounces Tofutti Cream Cheese
8 ounces Greek Yogurt
1/4 cup Spanish olives
1 tbsp olive juice
1/2 cup chopped walnuts
1 tsp organic all purpose seasoning
2 tbsp fresh dill, finely chopped or 2 tsp dried dill

Note: If you don't have [or like] dill, feel free to substitute fresh chives or parsley. Actually, I would suggest you mix it up with whatever herbs are freshest that day. Each herb will lend a delightfully verdant flavor in contrast to the smooth tanginess of the yogurt/cream cheese mixture. Yum...


Directions

1. In a medium bowl, combine cream cheese, yogurt and olive juice. Blend until smooth.

2. Stir in remaining ingredients: olives, walnuts, dill and seasoning.

3. Refridgerate until ready to serve.


Serve alongside Snack Factory Pretzel Crisps [beware - they are super addicting!!] or garden-inspired crudité like radishes, celery and carrots. Enjoy!

Tuesday, July 5, 2011

Iced, Iced Baby...


Raspberry Lemon-Thyme Iced Tea

Serves 6

Ingredients

2 earl grey tea bags
2 raspberry tea bags [I used Stash's Wild Raspberry]
1/2 cup fresh lemon thyme, rinsed
6 cups boiling water
1 tsbp sugar
3 lemons; 1 juiced and 2 sliced for garnish

ice cubes, for chilling and serving


Note: You may find it helpful to tie the thyme up with kitchen twine before steeping. When it comes time to pour the steeped tea into your pitcher, you just pull the string out - no mess, no fuss, just time for a tall glass of iced tea. If you don't have any twine, you can use a double mesh stainless-steel strainer as you transfer liquid to pitcher... obviously this could make more of a mess, so it is wise to do so over a sink. [I tried the previously mentioned "mesh method" last week and oops! we had a lovely sticky mess all over the dining room table, so trust me - use a sink.]

Directions

1. In a large ceramic bowl, combine tea bags, thyme, and boiling water.

2. Steep for at least 10 minutes and up to 30 minutes. You may refrigerate tea to speed up the process.

3. Fill pitcher with half a tray of ice cubes. Remove tea bags and thyme from bowl. Then carefully pour cooled mixture into prepped pitcher. Add lemon juice and sugar and stir with wooden spoon.

4. Top the pitcher off with a few slices of lemon.


Serve over ice and garnish glass with lemon wedge, if desired.


Hope you enjoyed all the pictures! As you can probably see, I couldn't wait to have a glass [or three] before taking the close-ups... it was soooo muggy out. Twas the perfect accompaniment to a hot summer's day... Enjoy!


Sunday, July 3, 2011

Melt for You


Santa Fe Turkey Melt

Finally, a yummy, buttery tasting, dairy-free mozzarella! For those of you who don't do dairy [because of an allergy, intolerance or for personal reasons] let me introduce you to Daiya, your new best friend. I found it at my local supermarket after trying several other non-dairy products, none of which were really good in pizzas, nachos or, my favorite ooey-gooey application, grilled cheese. So basic, but there's really no substitution. After all, there's really nothing left but buttery toast if you take away the cheese. So try it in a grilled cheese or in the recipe below.

Makes 1 sandwich

Ingredients

2 slices Scali bread
2 ounces Daiya Mozzarella Cheese [Vegan + endorsed by Oprah so you know it's good]
1/4 cup shredded organic cabbage
2 ounces of turkey breast, thinly sliced
2 thinly sliced tomatoes [press lightly between 2 paper towels to soak up excess moisture]
1 scallion, ends trimmed, thinly sliced on the diagonal

pinch of all purpose seasoning
freshly ground black pepper
canola margarine

hot sauce for dipping, optional

Note: I know what you're thinking... Cabbage in a tukey melt? Yes. It's delicious, just trust me. I decided to substitute cabbage for lettuce after having a hard time getting a good [non-akward] bite from my grilled sandwiches. Lettuce has a tendency to wilt and get a bit slimy if it gets too hot... but cabbage softens only slightly and will retain its crunchy goodness.

Directions

1. Heat a small cast iron or stainless steel skillet over medium-low heat. Prepare ingredients on a clean working surface for quick and easy assemblage.

2. Layer bread with 1 ounce cheese, cabbage, turkey, tomatoes, scallions, seasonings, and the remaining 1 ounce of cheese. Top with bread.

3. Spread outside of bread slices with canola margarine.

4. Place sandwich in skillet and cook until golden brown on each side, about 4 minutes per side.

5. Cut sandwich in half and serve.

Make sure to keep the hot sauce handy and enjoy!

Friday, July 1, 2011

Edible Arrangements


Herbs in Flower Arrangements

The herb garden has produced glorious amounts of chives this year. So many that I've been using their edible flowers in floral arrangements for around the house. I know I'll have to part with some of them next year [they are overwhelming the garden and falling all over the other herbs - it's a bit of a hot mess] but for now I'll just try to manage the beautiful chaos that is my herb garden.

In the arrangement above I paired chives with phlox and wildflowers all in various shades of purple and blue for a romantic monochromatic feel. Experiment! Use whatever you have in your own garden. Mix with wildflowers of different color combinations and textures.

Other herbs to include in arrangements are...

Sage | produces elegant purple flowers
Lavender | fragrant and beautifully linear, my favorite!
Chamomile | white flowers with a little hit of yellow
Anise Hyssop | dramatic purple flowers on long stems


Enjoy your gardens! It's raining here... and I am loving it. Yay for not having to water!

Wednesday, June 22, 2011

Eat Your Radish Sprouts!


Romaine Salad with Radish Sprouts and Avocado

Verdant, crunchy and a little bit spicy - this salad hits all the right notes. When tending my root veggies, I would always dread the thinning process. It seemed like such a waste to throw little seedlings aside, even if they were composted... I grew food to eat food, after all. Thinning is the process of removing plants to allow for others to grow in a row or area. By thinning radish sprouts, you allow for the radishes to fully develop to maturity by weeding out the competition. But save these little gems [as well as thinnings from beets, lettuces, and carrots] for eating, as I found out, they are an amazing addition to salads!

Serves 2-3

Ingredients

1 romaine heart, chopped
1 small white onion, halved and sliced
1 avocado, halved, pitted, peeled and diced
1 cup of radish sprouts
1/4 cup walnuts
1 cup croutons (I absolutely love Vermont's Olivia's Croutons Butter & Garlic combo - YUM!)

Note: Make sure to wash all lettuces thoroughly to rid leaves of dirt, bugs and bacteria. I have a large salad spinner that I absolutely love and use constantly throughout the year. They are remarkably easy to use and clean, and you can get a large salad on the table in less than 10 minutes. Radishes will have a bit more dirt on their roots, but give them a bath in a bowl of cold water and the grit will fall to the bottom.
Directions

1. In a large shallow bowl, combine romaine, onion and radish sprouts. Top salad with avocado, walnuts and croutons.


Serve with your favorite dressing. Vidalia Onion or Poppyseed would both be lovely.

Monday, May 23, 2011

Oat Couture


Home-made Oatmeal

This batch will last you an entire month, so go ahead and experiment with new toppings daily. Creating your own custom breakfast each morning will feel special and even helpful when you’re pressed for time. When in doubt, think to Go Nuts or Spice Things Up! My favorite combos are chopped pecans & a drizzle of maple syrup or fresh-from-the-garden blackberries with a sprinkle of granulated Stevia.

Makes about 28 servings

Ingredients

3 cups quick oats
4 cups rough milled oats (I use Silver Palate brand)
1/2 cup flax seed
1/3 cup brown sugar
1/2 tsp fine sea salt
1/4 tsp fresh ground nutmeg
3 tsp cinnamon

Note: Find or purchase a see-through container with tight fitting lid for easy storage and use. If it's on the counter and in plain sight, you'll always know there's a easy & healthy option for breakfast. Make sure it can hold 2 quarts and designate a stainless steel measuring cup for portioning the oatmeal. Each serving is roughly 1/3 cup dry mix.

Directions

1. In a food processor or blender, add 1 cups quick oats, 1 cup rough oats, flax seed, sugar, salt and spices. Pulse until blended and oatmeal is mostly powdered.

2. Pour mixture into a prepped storage container and combine with the remaining oats.


Everyone likes their oatmeal consistency a little different, but generally the ratio is 2 parts water per 1 part oatmeal.

Sunday, March 27, 2011

The Fennel Club


Roasted Fennel

If you have yet to try fennel, this is an excellent way to enjoy its' sweet, nutty flavor. Fennel is readily available year-round, but its' unique flavor is especially welcome during spring months. Make sure to rinse well with cold water and remove their unmistakably flamboyant stalks and fronds before use.

Serves 4-6

Ingredients:

2 large fennel bulbs, cored and quartered, then sliced into 1/2" strips
1 garlic clove, peeled and crushed (add more if using plain olive oil)
3 tbsp herb infused olive oil
1/2 tsp freshly ground pepper
1 tsp coarse sea salt

Note: I highly reccomend using Tuscan Herb Olive Oil from LeRoux.

Directions:

1. Preheat oven to 400 degrees. On a large rimmed baking sheet, toss fennel strips, garlic and olive oil. Season with salt and pepper. Roast fennel, tossing occasionally, til golden and slightly caramelized, about 30-40 minutes. Fennel should be cooked, but still have a bit of texture to it.

Serve alongside pan-seared scallops or atop pork chops. Enjoy!